
I always feel good about having a birthday card that I can send to my brothers. I have made cards using a similar fun fold but this particular fun fold is easy.
I want to thank Connie Stewart for sharing this fun fold. If you would like to create your own matchbook card see below.
You will need
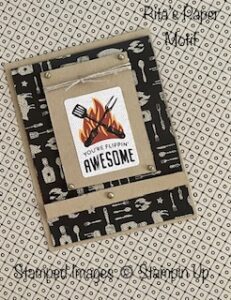
- A sheet of 11: x 4″ Designer Series Paper. I used “He’s The Man” DSP. You can change it up to what you want.
- With the 11″ side of the DSP at the top of your trimmer or scoreboard, score at 1″ and again at 5-1/2″. Fold on score lines.
- A 3-1/4″ x 3-1/2 piece of coordinating card stock. I used Crumb Cake card stock.
- 3-1/4″ x 2-3/4″ piece of Basic White card stock for sentiment. You can stamp your sentiment or if you have this DSP you can use one of the cut-a-parts like I did.
- 16″ piece of twine. I used the linen color but you can use a coordinating color.
- A 4-1/2″ x 4″ piece of Basic White card stock. This will be for your inside sentiment and personal message.
- A 1/2″ x 4″ strip of cordinating card stock. I used Crumb Cake.
- A 4-1/2″ x 5-1/2″ piece of coordinating card stock. I used Crumb Cake. This will be the piece of card stock that you adhere your card base to.
- Ahesive Backed Metallic dots.
- Tear & Tape
- Adhesive of choice.
- Dimensionals (opt)
To finish card.
- Secure your fold lines.The fold made at the 5-1/2″ mark will be what creates the front and back of your card base. You will have one short side and one longer side. The longer side iis the back of your card and the shorter side is the front of your card. The score mark you made at 1″ will fold over to meet the short side of the card. Thus creating the matchbook look.
- Wrap the twine around the top of the 3-1/4″ x 3-1/2 piece of coordinating card stock and tie a knot.
- Stamp your message on the 3-1/4″ x 2-3/4″ piece of Basic White card stock. Now adhere that on the 3-1/4″ x 3-1/2 piece of coordinating card stock You can either glue the layered sentiment on the front of the card base or you can use dimensionals.
- Stamp your inside message on the 4-1/2″ x 4″ piece of Basic White card stock. Then adhere on inside of the card base. Place this white card stock so that the stamped sentiment will not be covered up when you secure the 1″ flap.
- On the inside of the 1″ flap you created for the bottom of the front of your card, place some tear and tape as close to the fold line as possible. Remove the release paper and fold. this will close that flap so you can insert the bottom of the top half of the front of the card to create the match book fold.
- Finally adhere the 1″ strip to the bottom fold.
- Adhere the card base on to the 4-1/2″ x 5-1/2″ piece of coordinating card stock. This piece of card stock adds stability to the card when using DSP.
- Embellish with adesive backed metal dots.
You card is finished.
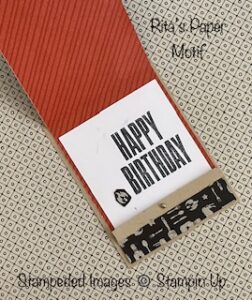
(Inside of my card)
