
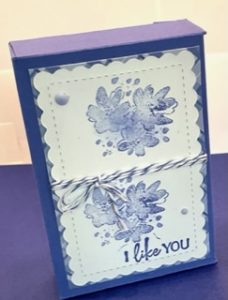
 This cute gift box when completed measures 4-7/8″ x 2-1/4″x1″. You can easily tuck several things inside and give along with a card or separately. You can choose what color card stock you want. I used Orchid Oasis #159267. You can decorate front as you like. I used the Flowing Flowers and Orchid Oasis ink #159214 on a basic white piece #159276 of card stock 2-1/2″ x 3-3/4″. I used the Scalloped Contour dies #155560 to decorate the white card. You can change it up however you want.
To make the box.
- Cut you 8-1/2″ x 11″ cardstock to 8-1/4″ x 6-7/8″.
- Score along the 8-1/4″ side at 2-7/8″, 3-7/8″, 6-3/4″, and 7-3/4″
- Rotate clockwise and score along the 6-7/8″ side at 1″, 5-1/4″, and 6-1/4″
- Fold on score lines and reinforce with bone folder.
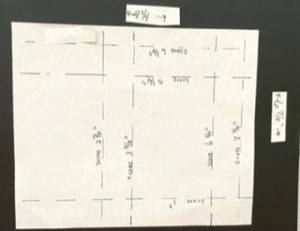

The cut as this template indicates with the crisscrossed lines.
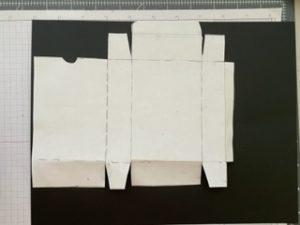
After you have cut as indicated your open box should look like this template.
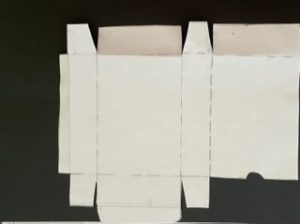
- Flip cardstock so that the thin folded part of the cardstock is now at the left-hand side.
- Starting at the left-hand side, at second fold, fold inward.
- On the thin strip that has been folded over place adhesive.
- On the right-hand side of template, fold at the first fold line so the edge is now sitting on top of the part where you placed the adhesive.
- Once adhesive is set you can refresh folds and you will see the making of the box. The you can close up the bottom by placing adhesive in the tabs and fold in. Then fold one of the more rectangle folds onto the tabs. Then place adhesive on that longer rectangle and fold over the remaining rectangle. you have now finished the bottom of the box.
- The top is finished by simply folding down tabs and folding at the score lines to finish the top of the box that should tuck in the box.
