
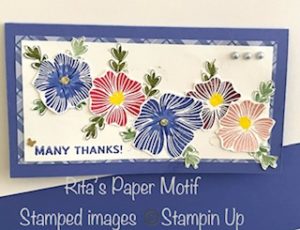
It is a pleasure to share this card and what you will need to recreate this mini slimline card.
Discovering the stamp set Heavenly Hollyhocks reminded me of a time in my youth. When I was in kindergarten a neighborhood friend and I would pick holly hocks from a neighbor’s flower garden. One day the neighbor caught us picking her flowers and showed us how to use the flowers and blooms to create ladies with beautiful ball gowns. After we created the fancy ladies the neighbor lady, brought out aa pan of water and showed us how to float the flower dolls. We would spend hours pretending our dolls were dancing at a fancy ball. Let’s just say we recreated Princesses on Water.
The Card:
- I cut a 7″x6-1/4″ piece of Orchid Oasis cardstock (#159267). With the 7″ side at the top of the trimmer I scored the cardstock at 3-1/2″. Creates a 6-1/4″x3-1/2″ card base.
- I cut a 5-1/4″ x 3″ piece of designer paper I used In Color Designer Series Paper (#159254)
- I cut a 2-3/4″ x 5-1/2 piece of Basic White (#159276) cardstock. This will layer on the designer series paper.
- I also cut a piece 3″ x 5″ piece of Basic White (#159276) to be the inside panel where your sentiment or personal message can be written.
- I used a scrap piece of Basic White cardstock to stamp 5 or the flowers on. I used Orchid Oasis (#159214), Sweet Sorbet (#159216), Merry Merlot (#147112) and Blushing Bride (#147100) ink to stamp the flowers.
- I used my Stampin Blends (#159223) to create some darker marks in the middle of the flowers. This is purely optional.
- I used a scrap piece of Basic White card stock to stamp the leaves I wanted to adhere around my flowers. I used Evening Evergreen ink to stamp leaves.
Next
- I stamped the different flowers with chosen inks on a scrap of Basic White cardstock. I then fussy cut the flowers. If you purchased the dies, you could use the dies to cut out your flowers.
- I also stamped the middle of the flowers with the little round stamp. I used Versa Mark ink (#102283). Of course I used my embossing buddy to ensure the embossing powder would be where I intended it to be. I then heat embossed the middle of the flowers with yellow embossing powder. You could also use Daffodil Delight ink and stamp the middles.
- I stamped the leaves in another scrap piece of basic White cardstock. I fussy cut the leaves.
- Then on the piece for the inside I stamped my sentiment. I used “You Make My Life Brighter from the stamp set. I used Orchid Oasis Ink. With my adhesive I adhered this stamp to the inside of the card base.
- I stamped in Orchid Oasis ink the sentiment “Many Thanks” on the lower left corner of the Basic White layer.
- I then adhered the Basics White on the desired side of the designer Series paper. Then adhered the layers onto the front of the card base.
- Now I decided when and how I wanted my stamped flowers to lay on the Basic White panel on the front of the card. I used glue dots to adhere them.
- I then adhered the leave as I wanted using liquid glue.
- I also embellished the card by using the Pastel Pearls (#154971) on the upper right hand side of the card.
Here is another slim line card using same colors but varying the stamps, sentiment and embellishments.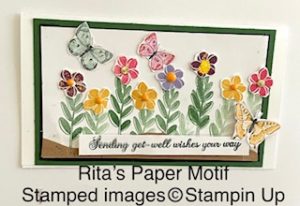
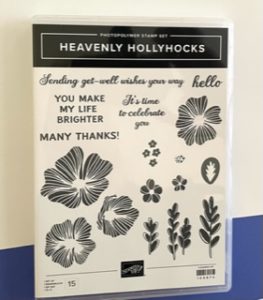
Heavenly Hollyhocks Stamp Set (#158874)
