
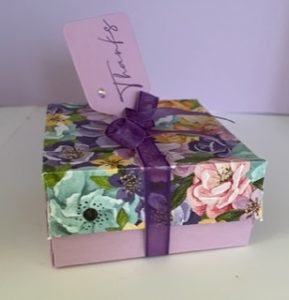
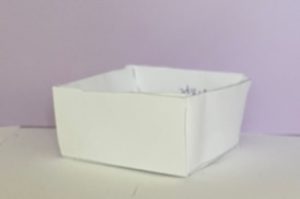
Finished Size – 3-1/4″H x 3-1/4″W x 1-5/8″D
To make this box you will need:
- 1 sheet Designer Series Paper. I used a sheet of Hues of Happiness #158822.
- 1 sheet of coordinating cardstock. I used Fresh Freesia #155612.
- Ribbon. I used Gorgeous Grape, but any purple or white ribbon will do.
- Paper trimmer #152392 and/or scoring board #122334. I use my trimmer.
- Bone folder #102300
- Tear & Tape #154031
- Adhesive. I used multi-purpose liquid glue #110755.
- Gorgeous Grape ink #147099.
- A tag die. I used the tag die from Sweet Hearts dies #157623.
- A 3″ x 3″ scrap of cardstock for tag. I used Fresh Freesia #155612.
- Scissors
Preparation:
- Cut the cardstock which will become the bottom of your box to 8-1/2″ x 8-1/2″.
- Then score on all sides at 1″ and at 2-5/8″. With bone folder crisp the folds. Now at each corner you will have 4 rectangles that are made by the score lines.
- Holding the score 8-1/2″ x8-1/2″ piece of cardstock in your hand cut up (vertically) 2 score lines.
- Next rotate the cardstock and from the left-hand side cut up (vertically) 2 score lines at the first score line.
- At the next score line cut up 1 score line. You should have just cut 3 rectangles off the bottom left-hand corner.
- Then at the next score line cut up one line.
- At the last score line cut up 2 score lines. Now you should have just cut off 3 rectangles from the right corner.
- Repeat step 3-6 on the next 2 sides.
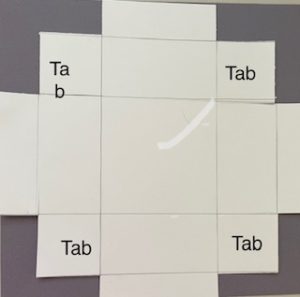
This template reflects what your card stock should look like.
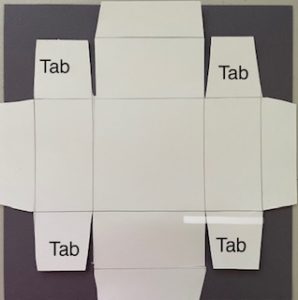
Now you have created the tabs that will form the base of your box. You will need to miter each tab as shown in the template below.
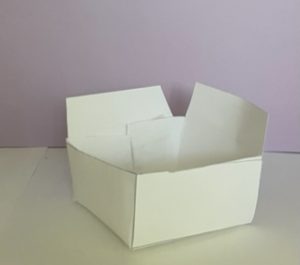
Now to finish the bottom or base of the box.
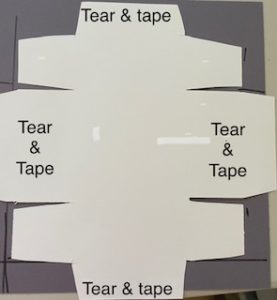
- Place strips of tear & tape on rectangles as indicated in template below.
- Then put glue on tabs as indicated on template below.
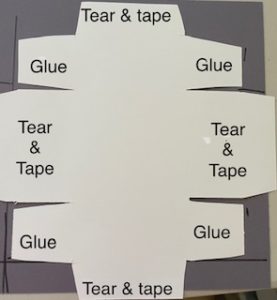
- Now fold the tabs with glue back the tabs onto the appropriate rectangle to create the box. Template below.
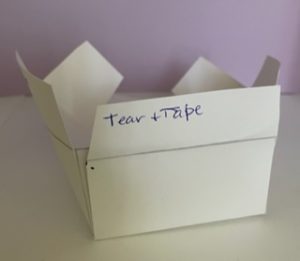
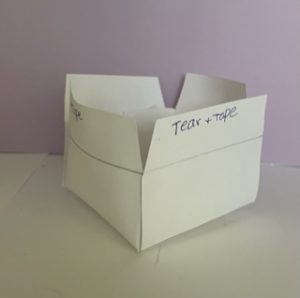
- Then remove release paper from tear & tape and fold down inside of box to finish.
For the lid of the box repeat procedure you completed for the bottom of the box. Only the measurements of the DSP and the score lines will be different.
- Cut the DSP which will become the top of your box to 7-5/8″ x 7-5/8″.
- Then score on all sides at 1″ and at 2″. Now at each corner you will have 4 rectangles that are made by the score lines.
- Holding the score 7-5/8″ x 7-5/8″ piece of DSP in your hand cut up (vertically) 2 score lines.
- Next rotate the DSP and from the left-hand side cut up (vertically) 2 score lines at the first score line.
- At the next score line cut up 1 score line. You should have just cut 3 rectangles off the bottom left-hand corner.
- Then at the next score line cut up one line.
- At the last score line cut up 2 score lines. Now you should have just cut off 3 rectangles from the right corner.
- Repeat step 3-6 on the next 2 sides.
- Finish lid as you did box bottom.
Fill your box and then decorate. To decorate:
- Place lid on filled box.
- Then cut your ribbon about 21″.
- Put one end of the ribbon through the hole on the tag that you have already cut with the die and stamped with your sentiment of choice.
- Wrap ribbon around box and tie a bow.
