
Sometimes when paper crafters use the Stamparatus to get that perfect stamped image, they find that the image looks better when they apply even but gentle pressure on the cover plate. Many paper crafters use the palm of their hand or their fingers. Many have either purchased a tool or have made their own. I decided to make my own.
I took a lid from an apothecary jar, some batting and felt I had in my fabric drawer, chipboard and my glue gun to make this tool. If you want to make your own tool.
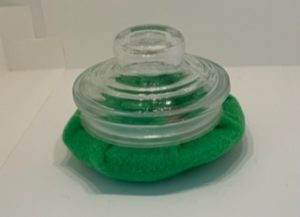
- You will need a jar lid like the one I used or something with a knob, like the finial off an end piece of a staircase. I have even seen candle holders used.
- Then you need cotton or some material to act as a padding.
- You will need chipboard that you can cut into a circle the same diameter as the bottom of your lid.
- You will need a square of fabric to cover the padded bottom of your tool.
- Then you will need a glue gun and glue sticks to secure the fabric.
I placed the chipboard under the bottom or the jar lid and traced a circle. Then I cut out the circle.
I cut a circle of the batting and placed it on top of the chipboard circle.
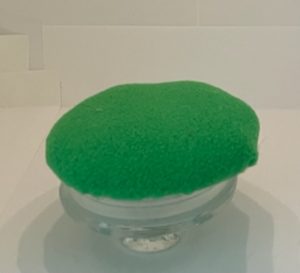
I cut a square of the felt so that I could cover the batting and secure it to the underside of the chipboard. I laid the felt down and placed the batting on top. Then I placed the chipboard circle on top. I took the ends of the felt and stapled them to the chipboard. I continued this process until the felt covered the batting and was secure on the chipboard.
Finally, I placed hot glue all around the edge of the jar lid opening. I then placed the glued side down onto the covered chipboard. So, I had a firm pillow on the bottom of my jar lid.
I have seen these tools made with furniture sliders however I wanted my tool to have a little bevel on the bottom.
This is how the bottom looks when finished.
Try it and let me know how it works for you.
