
Slim Line Cards are so popular these days for so many reasons. The measurements may vary but the appeal does not. There is commonly a regular slim line card and then there are the mini slim line cards.
The regular slim line card largely measures 7-1/2″ x 8-1/2″. With the 7″ side at the top of any scoreboard it is scored at 3-1/2. Then folded at score mark. The finished size after scoring usually measures 8-1/2″ x 3-1/2″.
The cards fit nicely in a business size envelope. This envelope is also referred to as a #10 envelope.
Then there is my favorite, the mini slim line. Now the sizes for the mini size slim line vary. I use the 7″ x 6-1/2 measurement. With the 7″ side at the top of my paper trimmer I score at 3-1/2. The folded car then measures 6-12″x3-1/2″.
This mini card fits in a #8 envelope. These envelopes can be found at office supply stores or even on Amazon. However, I like to make my own envelopes to match my cards. So below you will find the steps I take to make my envelopes.
To make your envelope you will need:
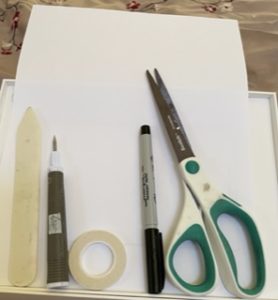
- A piece of desired cardstock cut to 8-1/2″x9″
- Bone folder, (#102300)
- take a pick tool. (#144107)
- Tear & Tape or double-sided tape (#154031).
- A pen to address your finished envelope.
- Scissors
- Trimmer (#152392) or score board (# 1122334)
Then score:
With the 8-1/2″ side at top of the trimmer score at 1″ and then at 7-1/2″. Then with the 9″ side at the top of the trimmer score at 2″ and 5-1/2″
Next:
Fold on score lines and secure them with a bone folder. With the 9″ side facing upward use your scissors to cut from the left towards the right along the score line. Cut along the score line to where that line meets at the score line from the 8-12″ side. Thus, you will have cut out the corner rectangle. Repeat on all four corners.
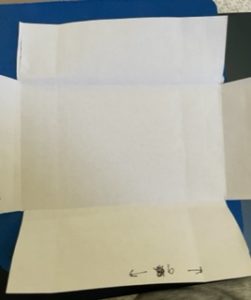
When finished cutting your cardstock should look like this.
Next:

With the 9″ side facing upward and fold the 2″ panel down. Place tear & tape on the edge of this panel. Withe you take-a-pick tool remove the release paper on the tape. Then fold the 2-1/2″ panel at the bottom up onto the panel that has the tear & tape on it.
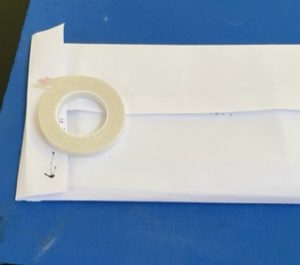
Then put tear & tape on the edge of the 1″ panel that should be on the left side. With take-a-pick tool remove the release paper and fold over onto the envelope.
Almost finished.
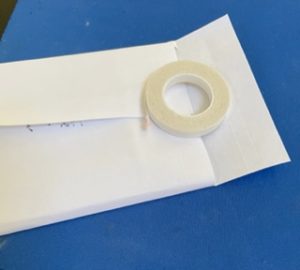
Now place some tear & tape on the 2-1/2″ panel that is on the right.
Once the card is placed inside the envelope the release paper can be removed and panel folded over to seal envelope. The envelope can be addressed and mailed.
**The size of the envelope will not require more postage. However, the weight or thickness of the card may require more postage. I try to be mindful of that. **
